Saturday, April 30, 2011

Wow! Just 1 coat of shellac

I have spent about 4 hours applying Shellac. My arms are feeling it right now, not to mention so does my back. After sanding the birch, I washed it with Murphy Oil Soap. I have applied the first coat, and boy what a difference it has made.

You can see the difference in this picture. The wall with shellac compare to the cabinet


Again the wall and outside cabinet with shellac, the inside of the cabenit and ceiling without


Same as above


This is the product I used. Total 1 quart of Shellac

I will next sand with steel wool and apply a second coat, but not today. After enough coats to achieve a nice warm glow, I will most likely apply a paste wax.

I was very worried about using Shellac, but at this point was amazed at the results. Today was a perfect day to use Shellac. The temperature was low 60's F, low humidity, and a nice breeze to keep the fumes down. I applied it by not brushing, but by stroking one way with the grain of the wood. I would begin a small area and start about 1/2 inch inside the corner and work outwards and than trim the 1/2 inch remaining. Shellac dries very quickly, so I did small areas at a time. One thing I have learned over the years, is not to go cheap with your brush. You must put some money into the brush to have a good finish.

You can still see blemishes in the wood, but I personally like that look. I'm not going for a new look, just a nice vintage look. She is about as old as me, and it's okay to have wrinkles. 

Friday, April 29, 2011

Sanding the Birch

After work it was such a sunny day, which I should say we have not seen sun in many many days, I decided to continue with sanding the interior. I can say tonight I have almost completed sanding the beautiful birch wood.

 I used a fine grit sandpaper 180 and a hand sander with lots of elbow grease.


The next step will be to wash the birch with Murphy Oil Soap. I plan on using Amber shellac, which is originally how the wood would have looked when new.  

Also, I washed out 49 years of dirt from the cabinets. I'm not sure what I am going to do with the shelves, maybe a nice paint job or just contact/shelf liner. Nothing special about the shelves.


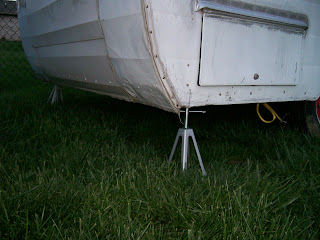
Notice I purchased a set of trailer jacks. No more free rides for Bill!

Supplies came today from Vintage Trailer Supply.

front left Jalousie Bulb Seal for windows, front right Jalousie window glass seal
Back row left Butyl Putty tape, back row right Pile weatherstrip
I'll be busy working on the windows soon!


I love this company! 


Wednesday, April 27, 2011

Cars & Guitars of Seymour

Even though I am a long way from completing my restoration of my 62 Compact, I have been invited to place her in the local Cars & Guitars of Seymour, Indiana. I thought it would be a great way for my friends to stop by and say "Hi" and see Rosie in person. Also, it's a great organization.

http://carsandguitarsofseymour.com/

Tuesday, April 26, 2011

Vintage Coffee Percolator

See what came in the mail today! A vintage coffee percolator. I seen the percolator on e-bay and though how cute to have this for the Compact. It was still in the original box. I haven't tried it out yet, I hope it will work. It's the 1970's color Harvest Gold. Watch out I may need to find me some go-go boots!


I don't think my calves can fit anymore!

1 away from 2000 views

At this time, since I started my blog, I am one away from 2000 views. Who will that be? Please leave a comment if you are the 2000th viewer!

Tuesday, April 19, 2011

Curtains done!

Today I finished Rosie's curtains. Also, you will notice I made a couple of pillows too. Can not wait to hang them, instead of staging between chairs.


Adventure with the Bureau of Motor Vehicles

I went to the Bureau of Motor Vehicle of Indiana today to title my 62 Shasta Compact. I do have the title in hand. I purchased her in August of 2010. The previous owner titled her in 1985 and last plated her in 2005.

I asked, "Is there a vintage plate I can purchase?"
BMV, looking bewildered, "No."
I thought, 'Thanks for checking,' I'm sure she knows everything about the BMV. I'll call the state later for information on vintage plates.

The BMV kept asking, "Is this a pop-up?" "No." three more times, after her asking the same questions again and again. I explained my Shasta does not have a bathroom. She proclaimed, "Neither do pop-ups." I clarified, "Some pop-ups now have bathroom with showers." Surprised look, "Oh, they do?" "No," again, she's not a pop-up.

I now have state form 39771, Body Clarification/Body Type Change Affidavit. She wrote instructions down. The P/D, she explained is the police department, is to fill out the bottom of the form. The BMV needs from the P/D, the make, model, length, and value of the travel trailer.

The form is valid for 14 days. I hope the P/D officer has knowledge of vintage Shasta Trailers!

I'll post more after I follow their guidelines.

It is a terrible rainy day here and no one wants to measure and check vin numbers in the rain and puddles.

Sunday, April 10, 2011

Floor insulation and boards are in! Second weekend problem or more!

On Sunday we began with putting insulation under the floor board.


That went quite well!

We placed the first section of the floor board in the rear of the camper.


All screwed down! Looks great!
Front section of flooring installed.


Why is there a gap between the boards?

We didn't remember a gap when we removed the floor boards???

Do you see what I see?


Had to laugh, even though it means more work for later!

Now we know why there is a gap in the floor boards.


Now that is much better!
 That problem solved! But wait! The door won't close!

Next problem!


We had to trim the floor board by the door.
The board was too thick.

Oh and if you see the grass stuck in the rear frame....

You know Bill took a ride on the inside as the camper tipped up when he walked to the rear!!
By the way he's okay! I love that man!


Wheel wells. First weekend problem!

The last project on Saturday was placing the fender wells into the camper. The first problem of the weekend was both fender wells were visible under the camper wheel well. Sooo....


...Problem solved with a hack saw and mallet!!

Wow! What a productive weekend!

This weekend was a very productive weekend. Where do I begin? On Saturday we finished the wiring. But not without desiding to add one more outlet, which will be under the bench seat. Hope to place an air conditioner under the seat.


Bill placed 1/2 inch wire conduit around the wire to protect
it under the camper.


The outlet in this picture will be located
under the camper for outdoor lighting.

We used plastic ties to help keep the wires
in place.

Sunday, April 3, 2011

Curtain rods and holds

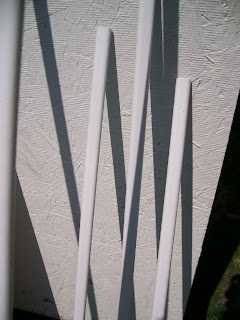
Even though the wind is blowing. I primed and than painted the curtain rods and holds this weekend with rustoleum glossy white. I am still needing two pairs of holders.

At least these are ready for the curtains when I complete that project!! Saving the curtain project for a rainy day. To beautiful of a day not to work on the Shasta.

Electrical box complete

The electrical box is now completed. Bill also added a plug under the cabinet area.


New Fender Well

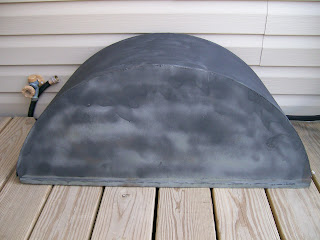
Here is my new fender well. Thanks to my son, Tim, who knows someone who has a metal shop. Trying to painting the fender today, but the wind is like 100 mph. Will paint it on another day.