Sunday, October 3, 2010

Kitchen Cabinet and drawers

Last thing I did today was to start sanding the kitchen cabinet door and drawers. I used a fine sanding block to remove scratches. This will be a winter project to finish them.


Before pics


Windows

Haven't had a lot of time to work on Rosie, but today I did some spray painting of the inside windows. Tried to polish, but was so pitted and just wouldn't shine. I first primed the window with Rust-oleum and I coated with Krylon matte aluminum. I don't know how it will hold up. I guess time will tell.


Also, I continued to polish the outside window aluminum. As you can see in the pictures not looking too bad.
I used a fine sanding block and steel wool. Plan of replacing screws later.

Sunday, September 19, 2010

Electrical plugs

No pictures to post from our work this weekend. Bill completed the tail lights this past Friday. Most of the lights work except for the front running lights. No wires were found so we will need to add wiring to make them function. Saturday he started adding electrical receptacles. We are adding one under the camper on the outside to run lights or a fan. He added a receptacle box inside in the back of the trailer. We will also be adding a receptacle box under the kitchen cabinet for the refrigerator. Our goal is to change out the fuse box for a bigger box.

While Bill was working on the electrical system, I began polishing the street side window frame. I used a fine sanding block, 3M Rubbing Compound, and steel wool. I found that by removing the screws one side at a time, polished that area and than replacing the screws works the best.

I promise to post pictures soon.

Here are the pictures I promised.
This is as far as Bill has gotten on replacing the fuse box
.

Plug added under the frame so we can have an outside plug.


Tuesday, September 14, 2010

Making her z-stripe shine


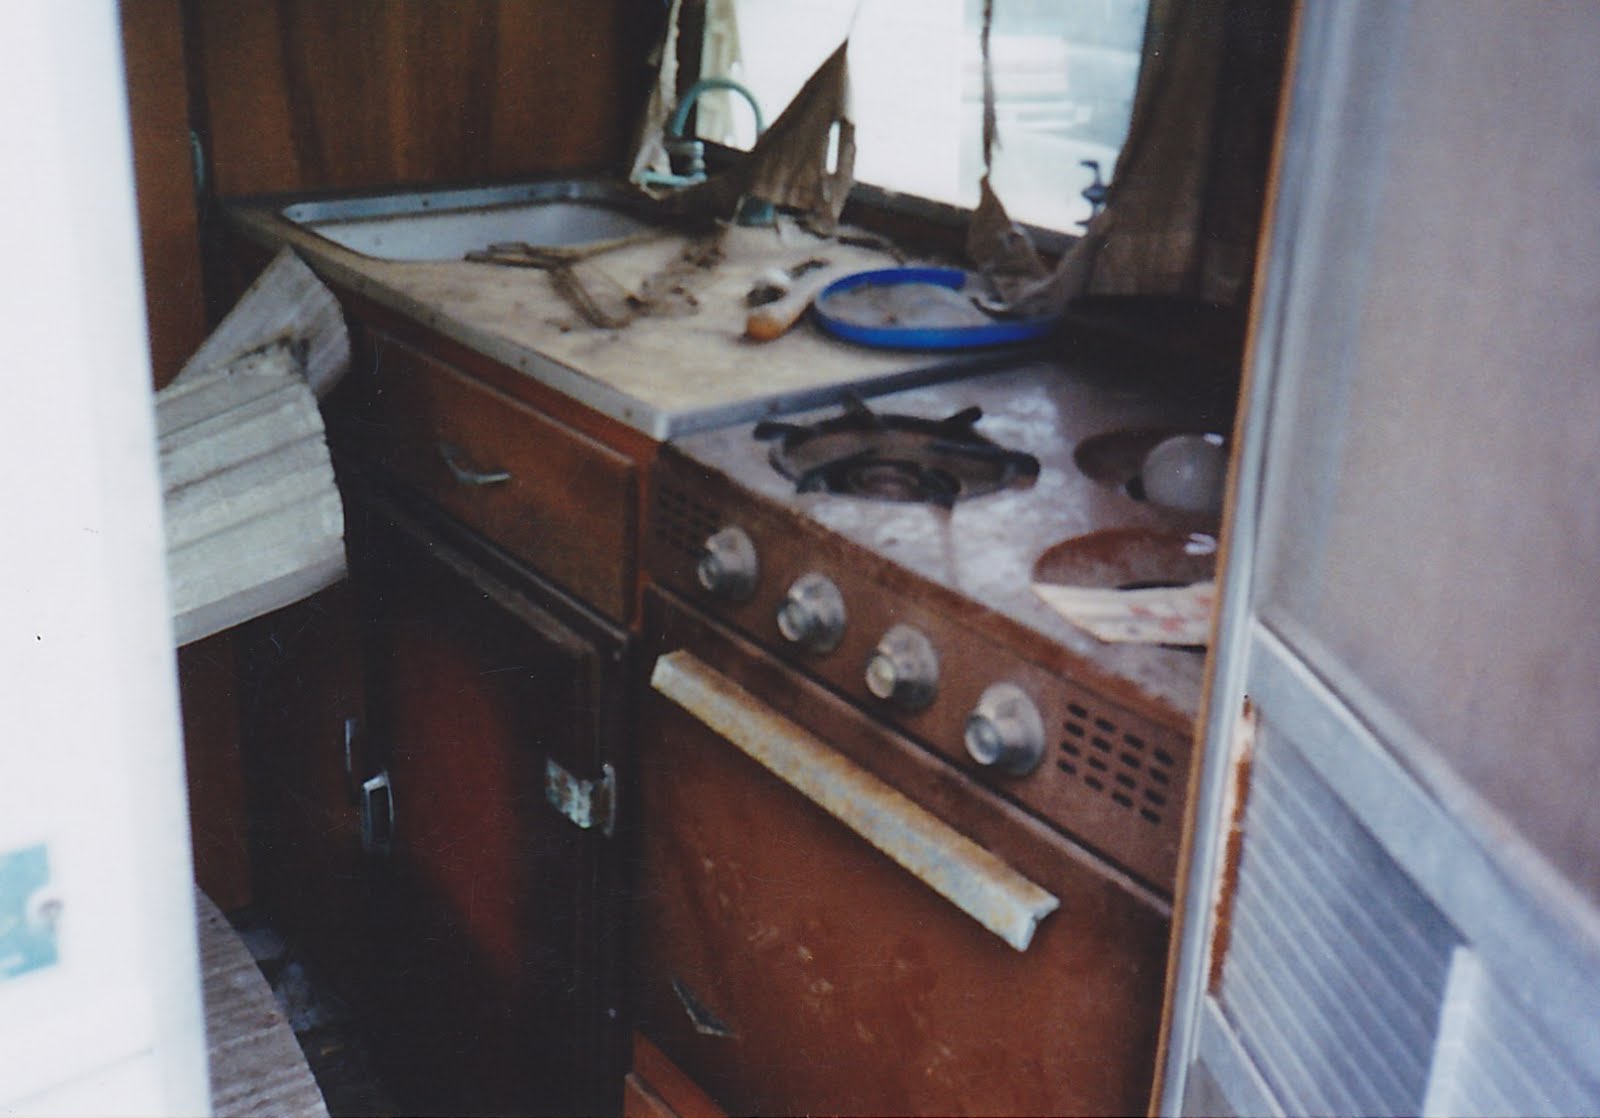
I have spent several days removing dry adhesive from the z-stripe from a red stripe that the former owner had applied. By the way, the red stripe blew off when we brought her home. I used a glass top stove razor to remove the adhesive. I tried adhesive remover, but with no avail.

I was up early this morning to beat the heat. I was so glad that today I would be starting to make her lighting bolt shine. I began by used a fine sanding block and went over the z-stripe in one direction. She has many scratches and dings, but I know I can make her shine again. After sanding her I applied two coats of 3M Rubbing Compound with a lot of elbow grease. I than completed today's shine by going over the z-stripe with a buff on a power drill. The next process will be applying Mothers Mag and Aluminum Polish, but that for another day.

The day ended with my girls coming over and giving her a bath. We discussed what we should name her and Rosie was the name that seems to match our little girl.

I will say I am ready for a hot bath and of course some ibuprofen.

Monday, September 13, 2010

Treasures behind wheel well

Playing Card
Could this be the names of the first Shasta owners
Amway
Better Camping
Better Camping

These treasures were found behind the wheel well as we were removing the floor of the Shasta.
Just wanted to share! The date on the Camping Better was May-June 1963.

Sunday, September 12, 2010

1st weekend of Renovation

This has been my 1st weekend of renovating the 1962 Shasta Compact. Or should I say destruction!

My husband Bill, who was not very thrilled with my dream of renovation a vintage Shasta Trailer, became my biggest helper. He began working on the electric lines to the tail lights, which meant following the wires under the trailer. In order to work on the wires he removed the flooring to be able to work on the lights.


Bill working on Shasta 


 So while the frame was exposed I undercoated with Rust-oleum. 


Shasta with flooring removed

Undercoated


Misc. pictures of my 1962 Shasta Compact


Just a few pictures to my Shasta.

Pictures from the former owner


The owner was nice enough to provide me with copies of pictures he took of the little Shasta when he purchased her. He did a great job of putting her skin back together!

Love at first sight!

I have been looking for a Shasta with "wings" all summer. I first seen my little Shasta on Craigslist and called the seller and ask for information and pictures. The little Shasta was a 2 1/2 hour drive a way and I wanted to know as much about her before driving the distance.

On Saturday, August 28, 2010, my husband Bill and I drove from Seymour, Indiana, to Richmond, Indiana. It was love at first sight and I purchased the little 1962 Shasta Compact. The tail lights were not hooked up on her so we drove much of the way home following the roads less traveled.
Cleaning out the inside